HOW TO INSTALL AND CONFIGURE VISUAL STUDIO FOR PYTHON

In this blog, we will see about the step by step process of installation of visual studio code and add the python extension to them. Visual studio code is an light weight ,open source and extensible editor available for all platforms.

Below are the steps required to complete the installation and configure of visual studio code with python,

  1. Install Visual Studio code
  2. Install Python Interpreter
  3. Install Python Extension for VS  code

INSTALL VISUAL STUDIO CODE:

  1. Download visual studio code from VS code website.
  2. Choose the download the VS code editor for your operating system. Here we are going to see for Windows.
  3. Double click to install the downloaded setup.exe file.

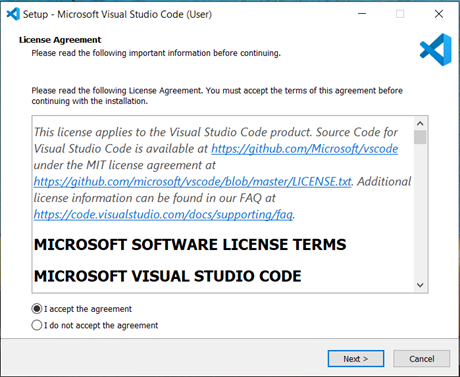
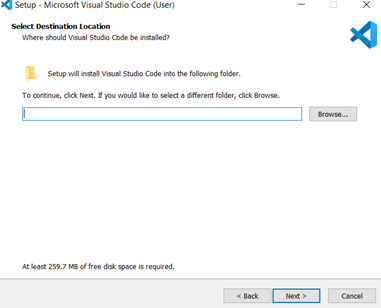
ii)   Click Next on the setup dialog box. Choose the install folder for the VS code and click Next.

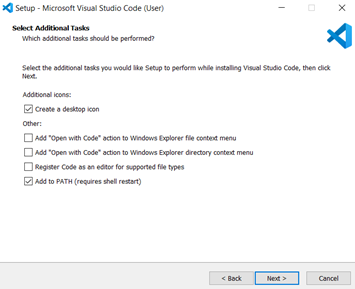
In the next dialog, check create desktop icon for easy access of the tool. Select Next and Install.

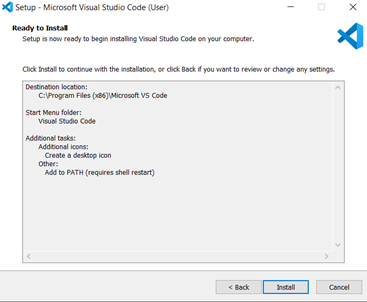
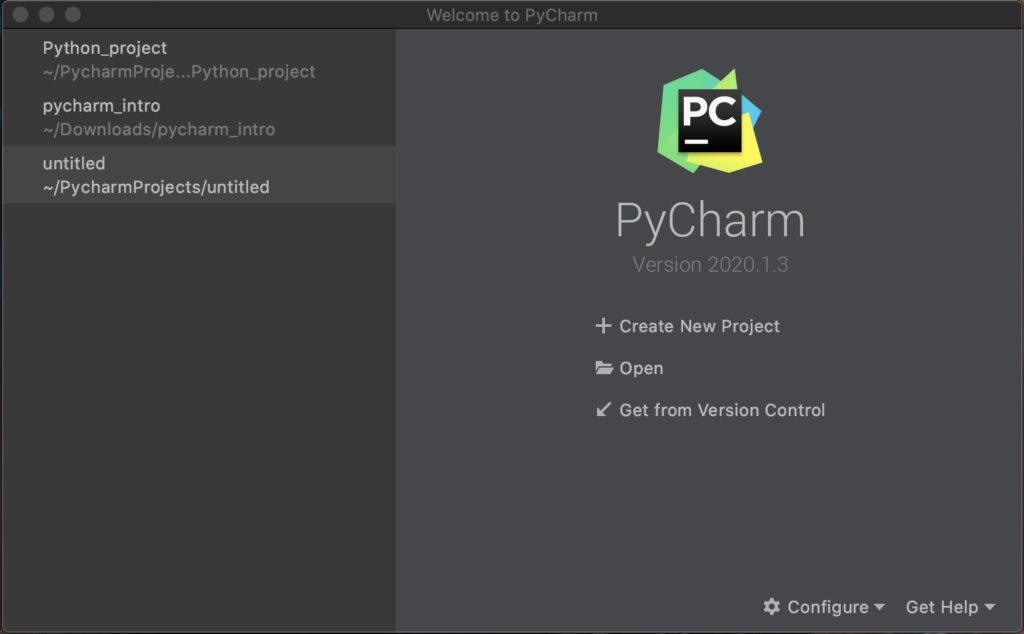
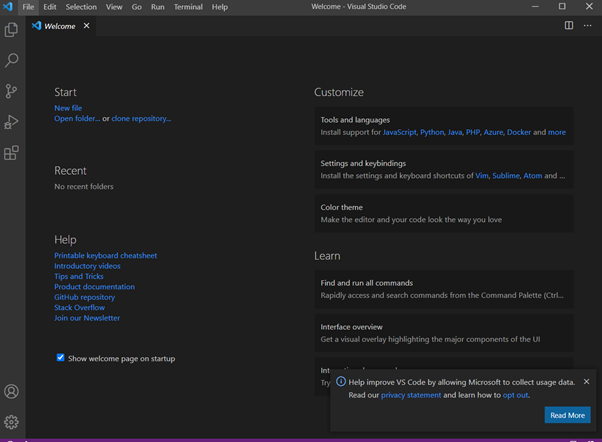
After proper install of VS code, the VS code editor will open with home screen.

INSTALL OF PYTHON INTERPRETER

  1. Download Python from Python.org. The latest version of python will be available on the home page and you can directly download the same.
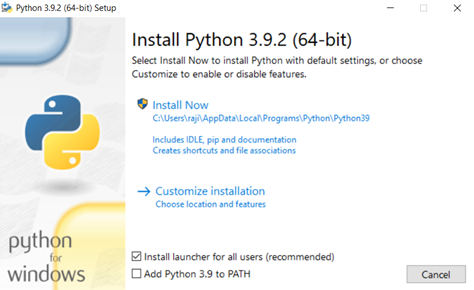
  2. Open the pythonsetup.exe file and select install now option.
  1. Select Yes on the User account control dialog prompted to install python.
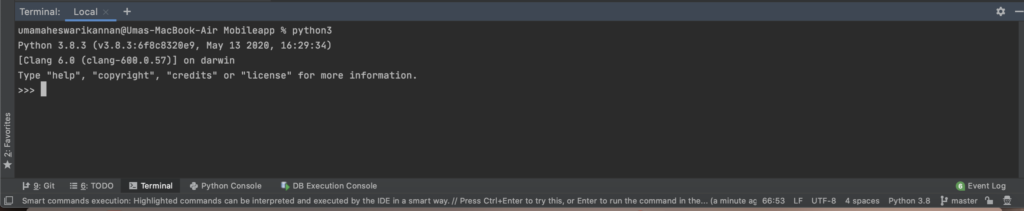
  2. To verify if python was successfully installed, put the command to check the version of the python in the command prompt or terminal window.

Windows:                 py -3 –version

Linus/MAC OS:        python3 version

INSTALL PYTHON EXTENSION FOR VS CODE:

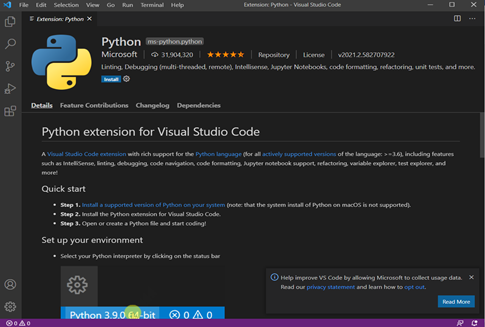
  1. Download the python extension from VS CODE Marketplace. Once the extension is selected for install , it will prompt to VS code.
  2. Select Install option on the extension page opened on VS code editor.

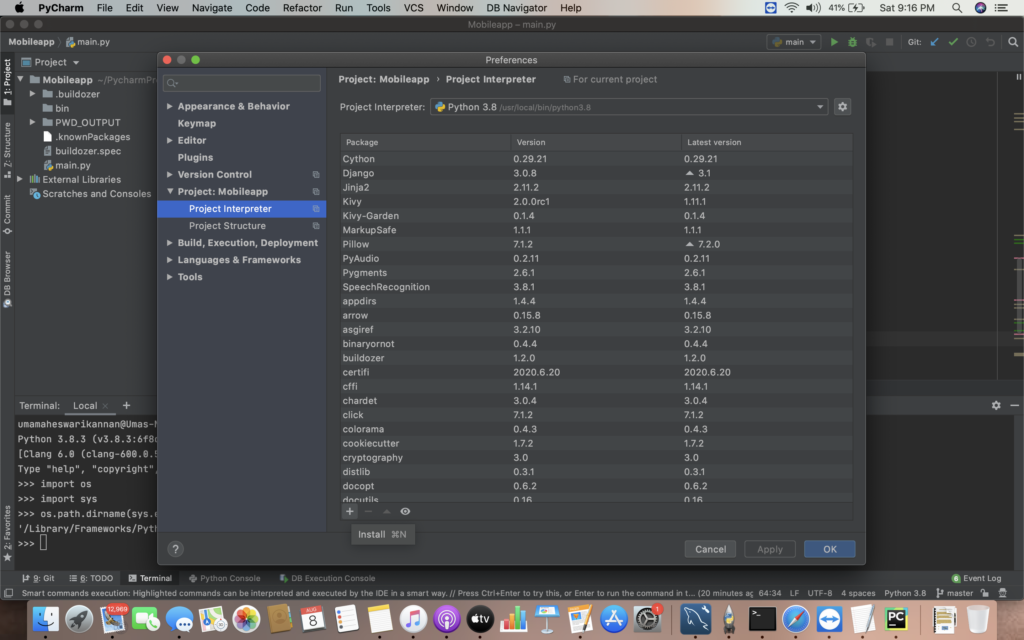
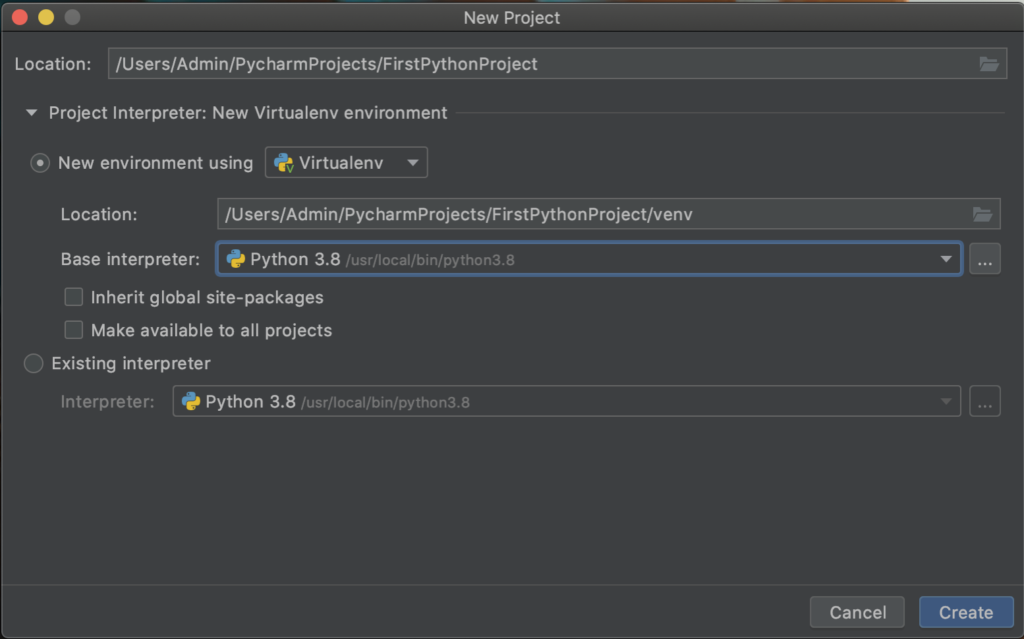
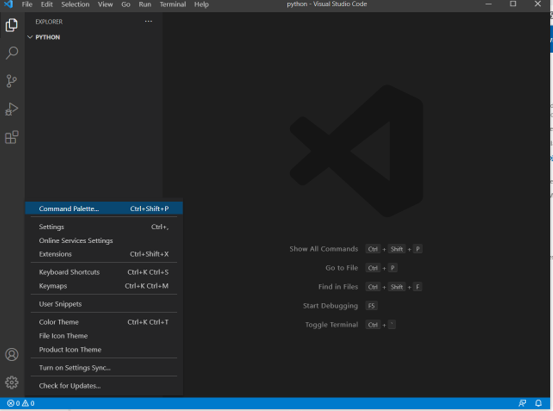
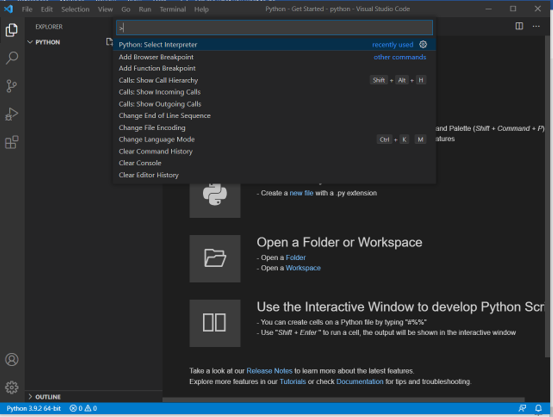
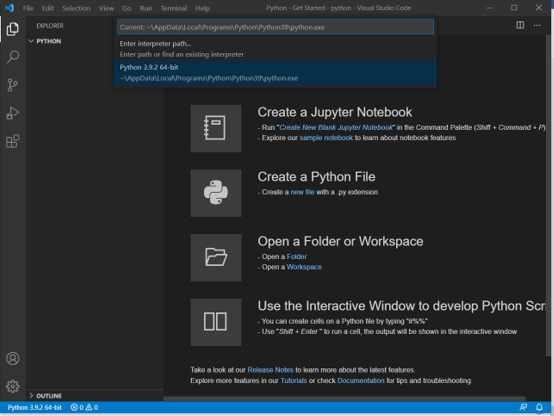
After install of python extension, the python interpreter should be chosen to run the python programs. For that select settings->Command Palette and type (Python:Select Interpreter).Choose the python Interpreter installed in previous step.

Now you are ready to start code on python programs.

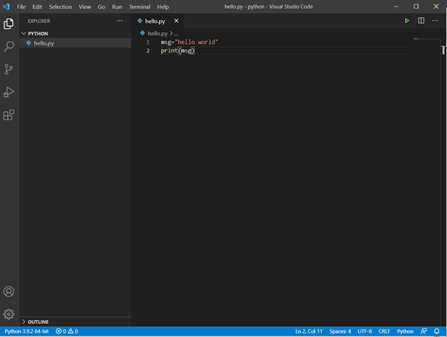
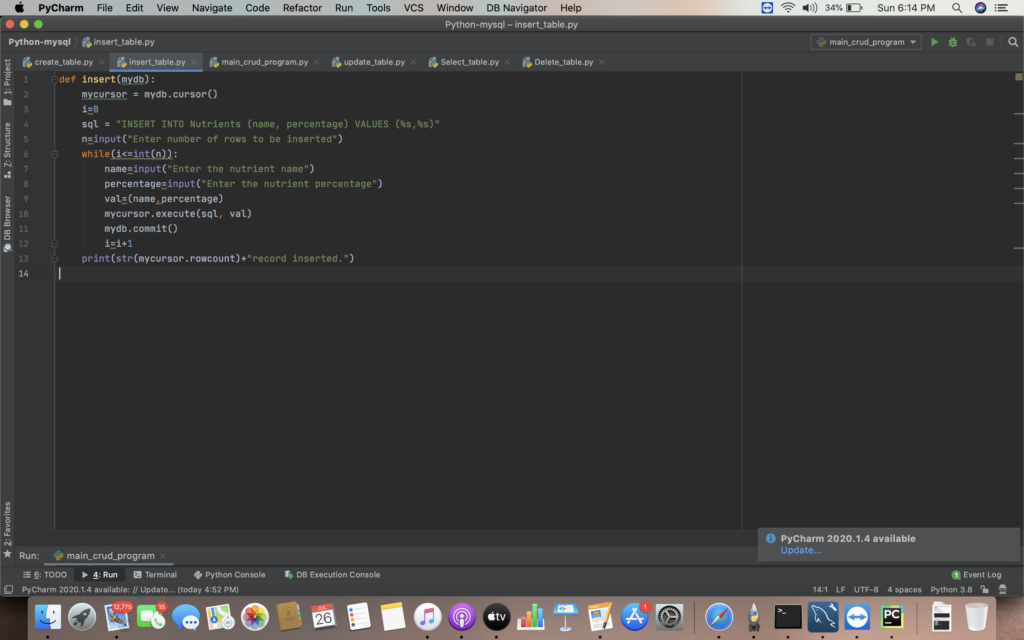
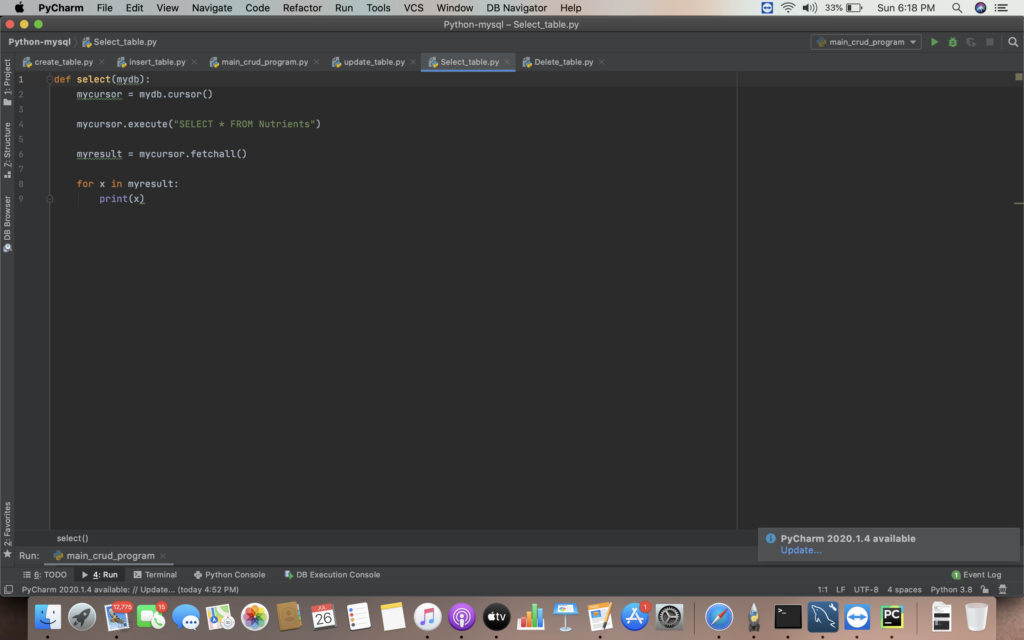
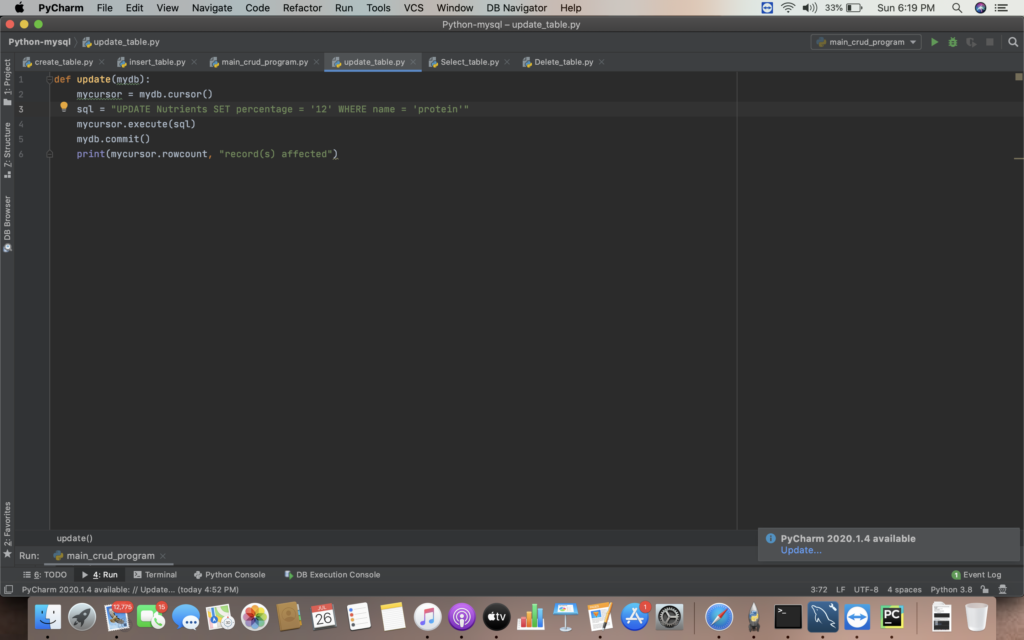
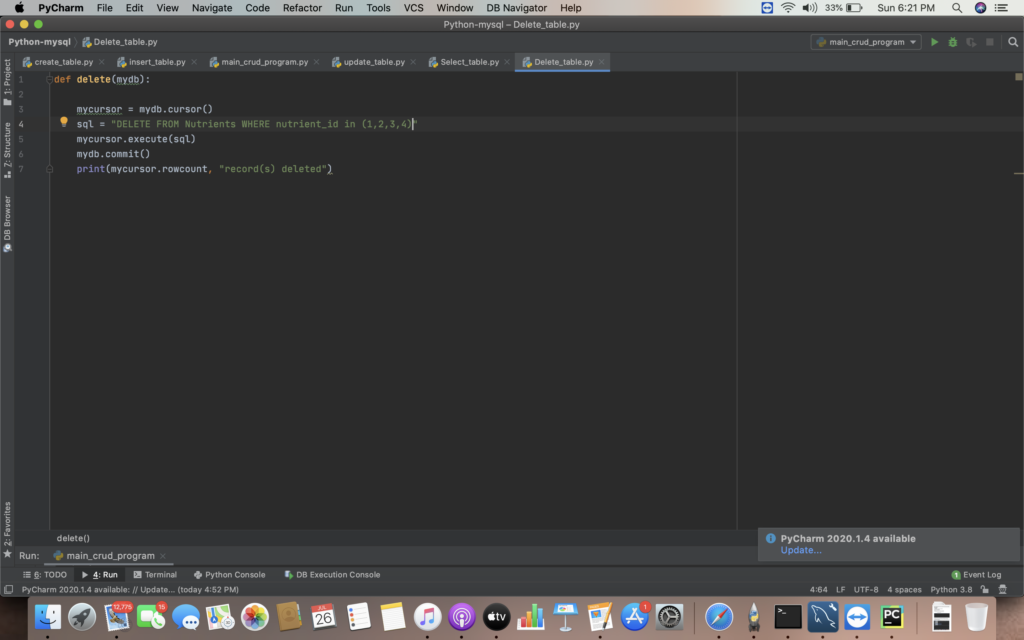
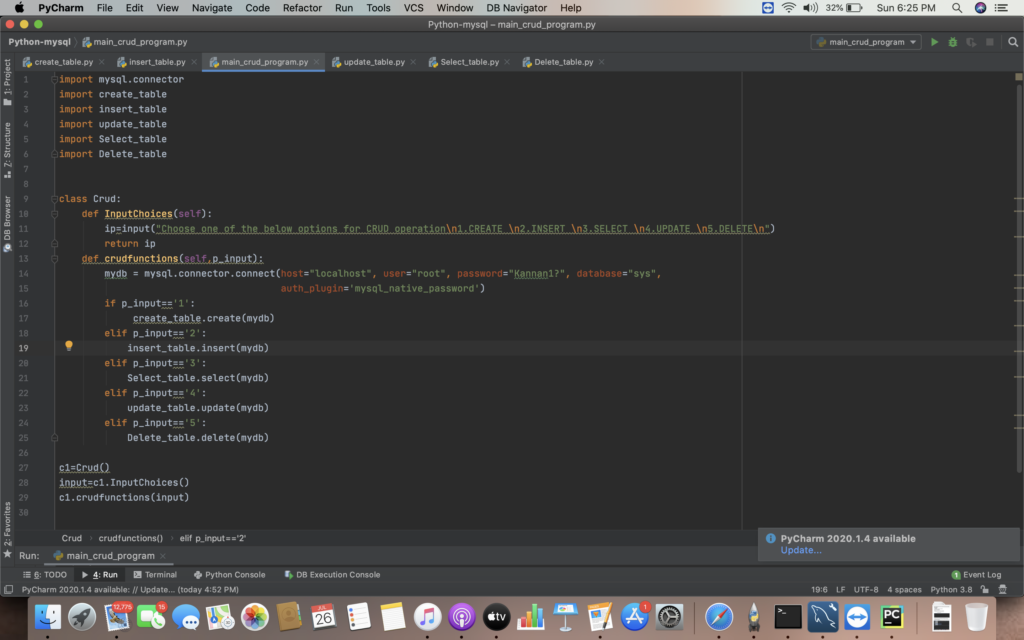
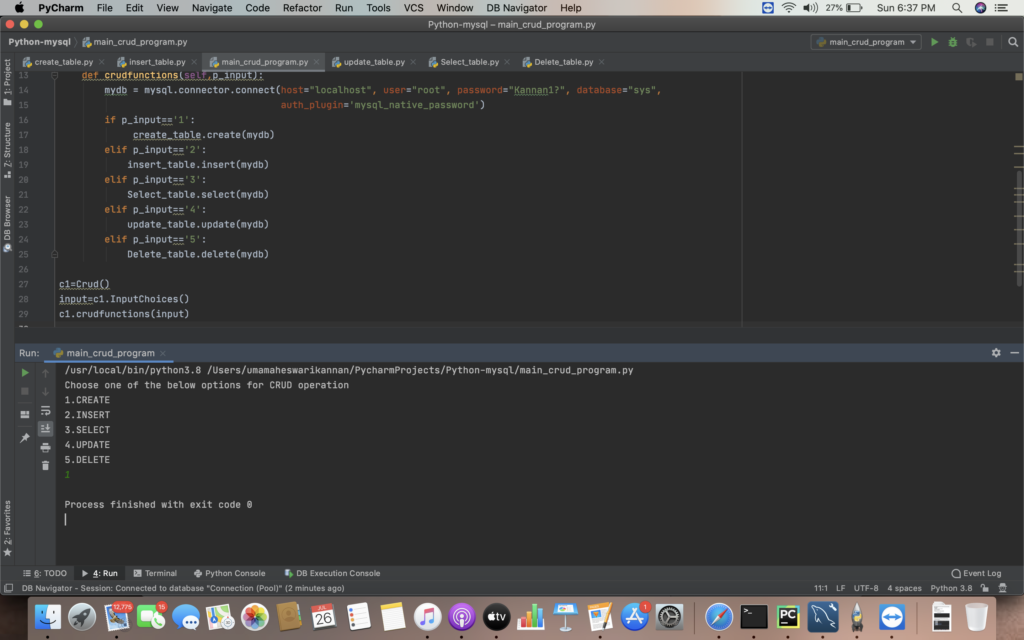
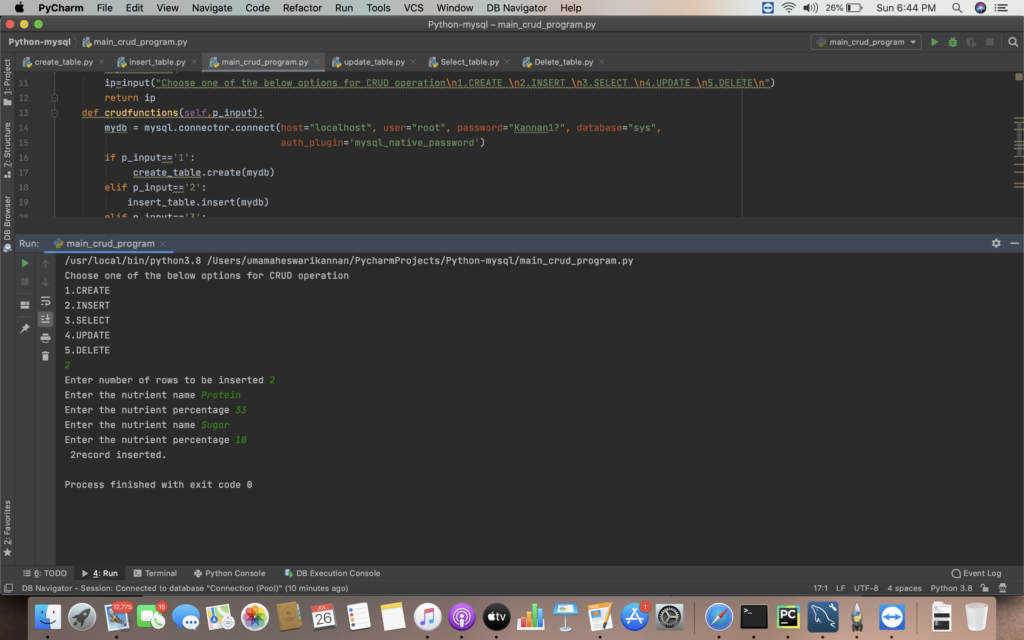
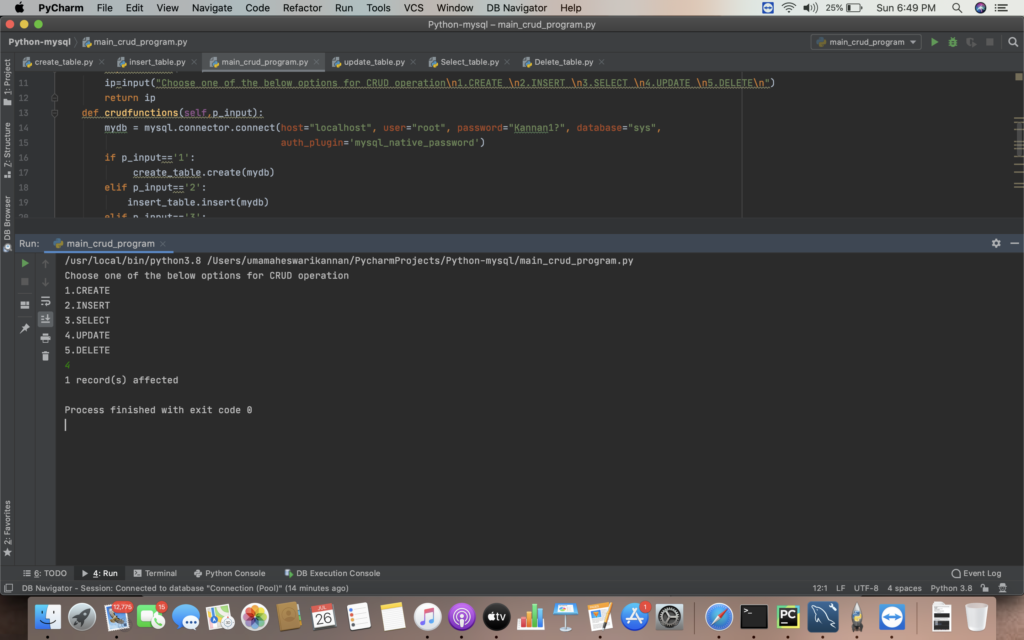
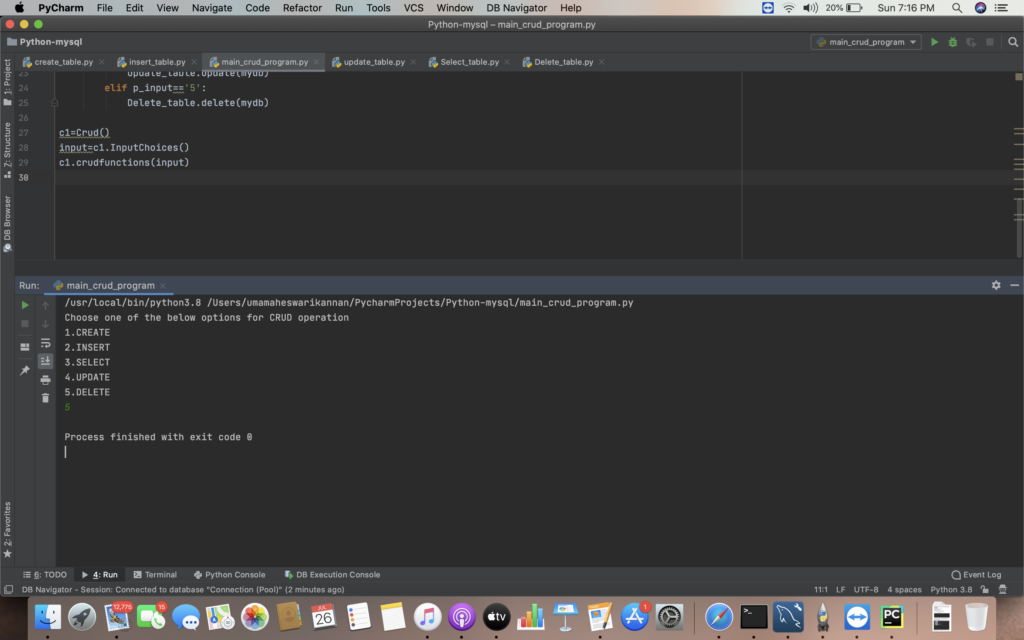
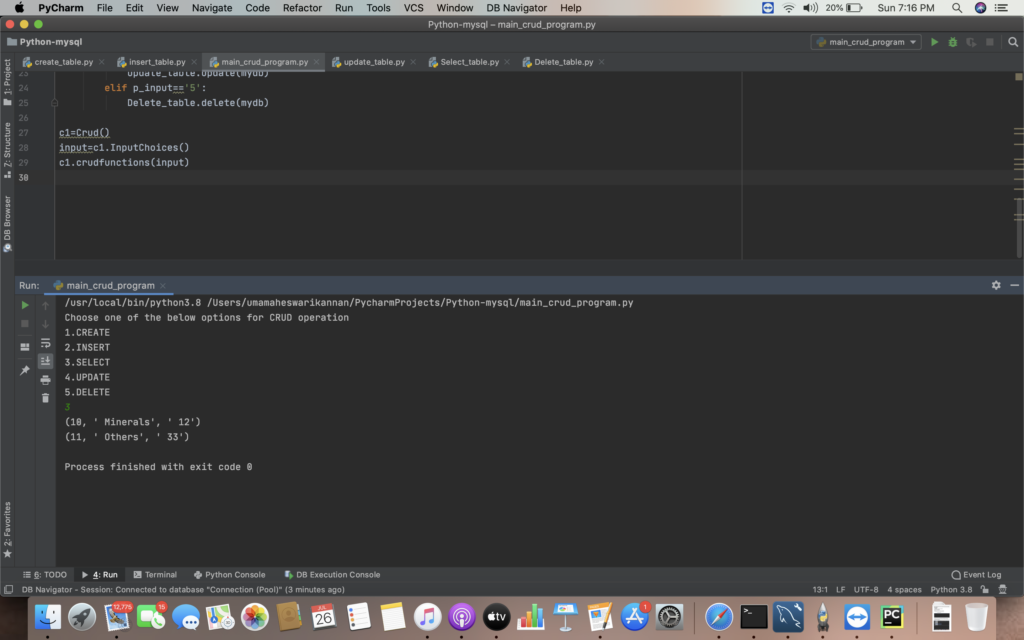
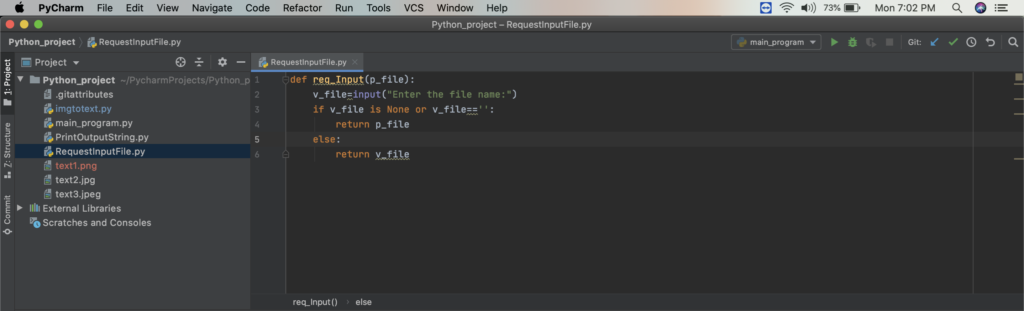
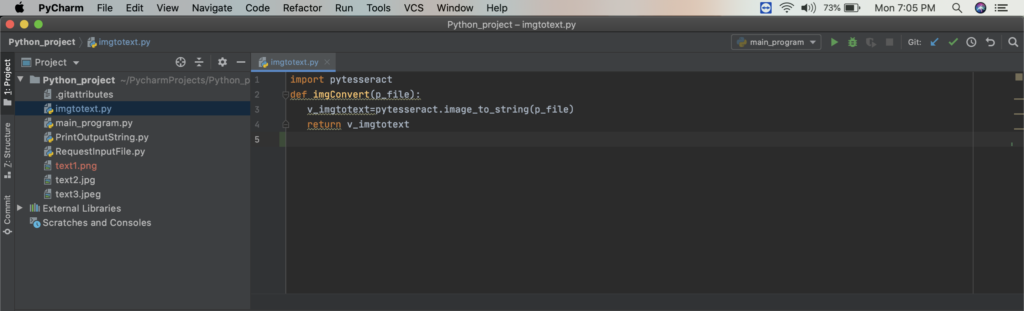
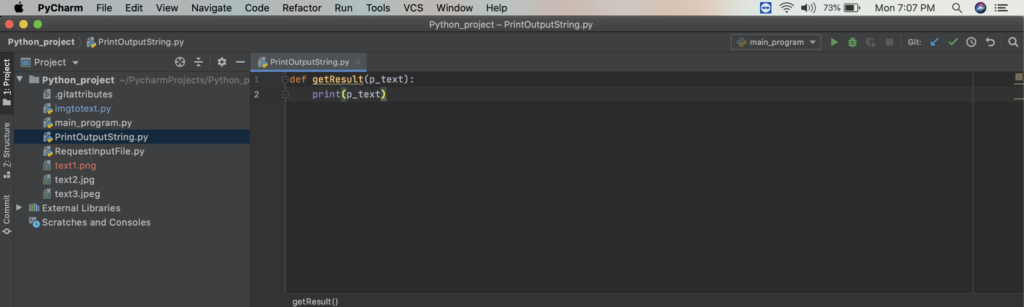
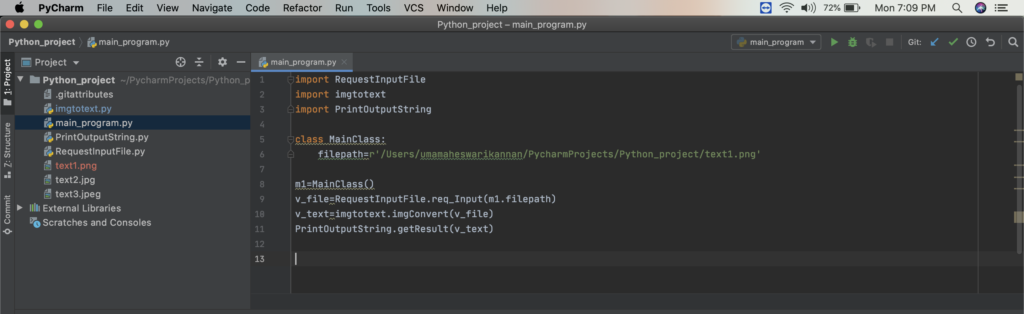
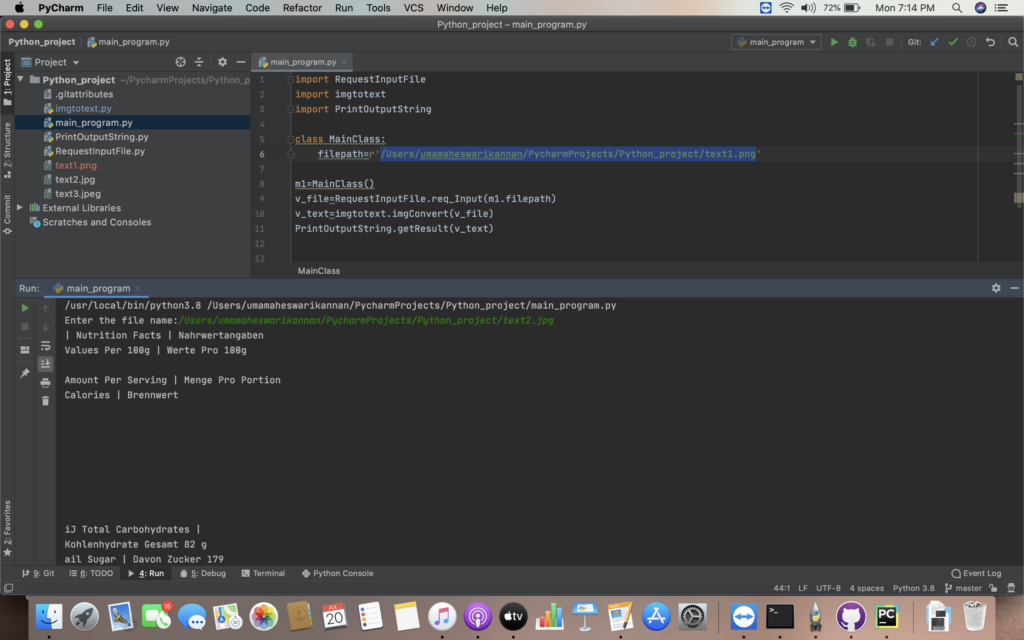
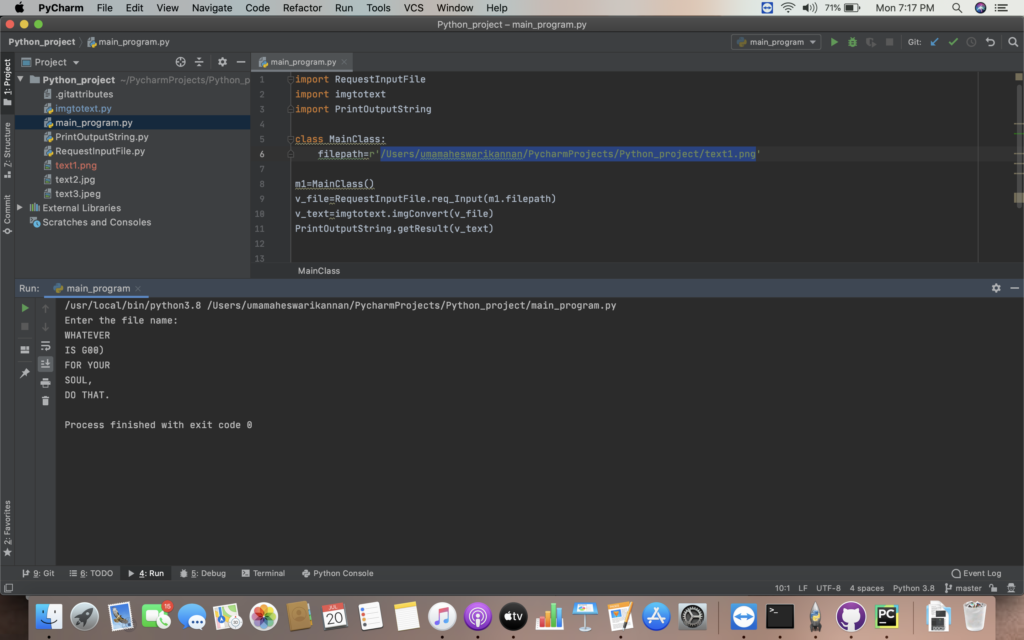
LETS WRITE A SIMPLE PYTHON PROGRAM TO VERIFY THE INSTALLATION

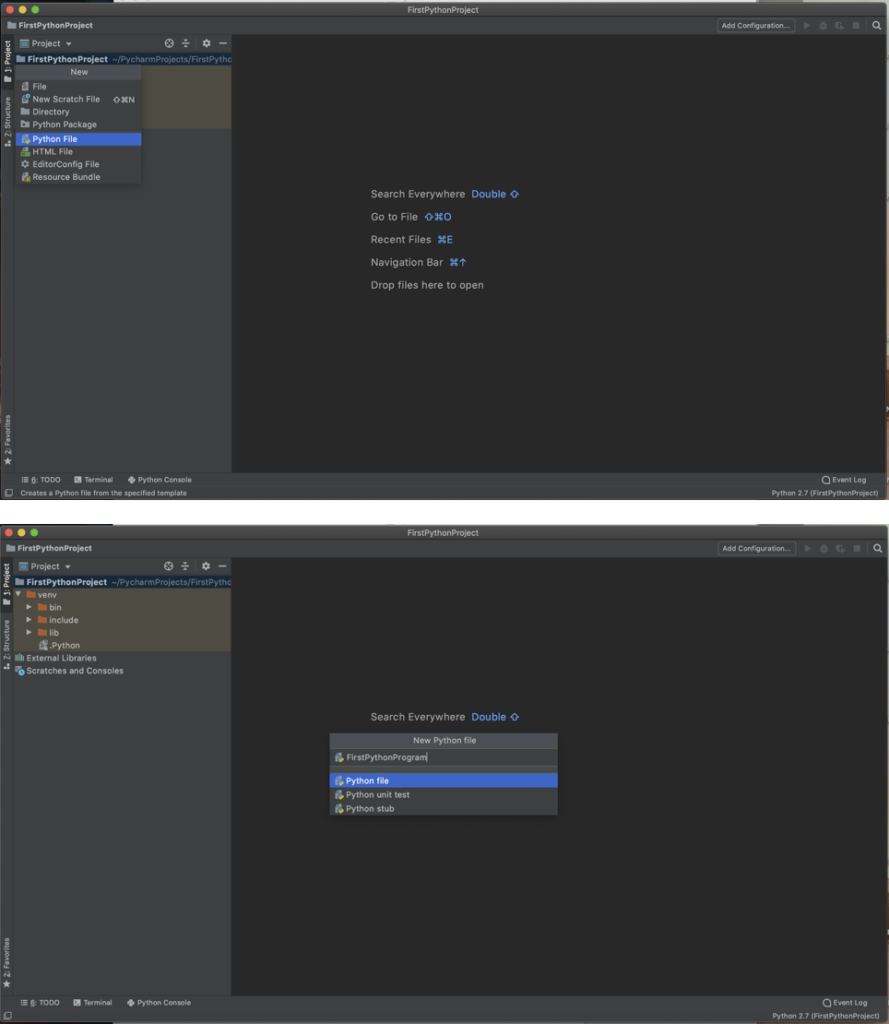
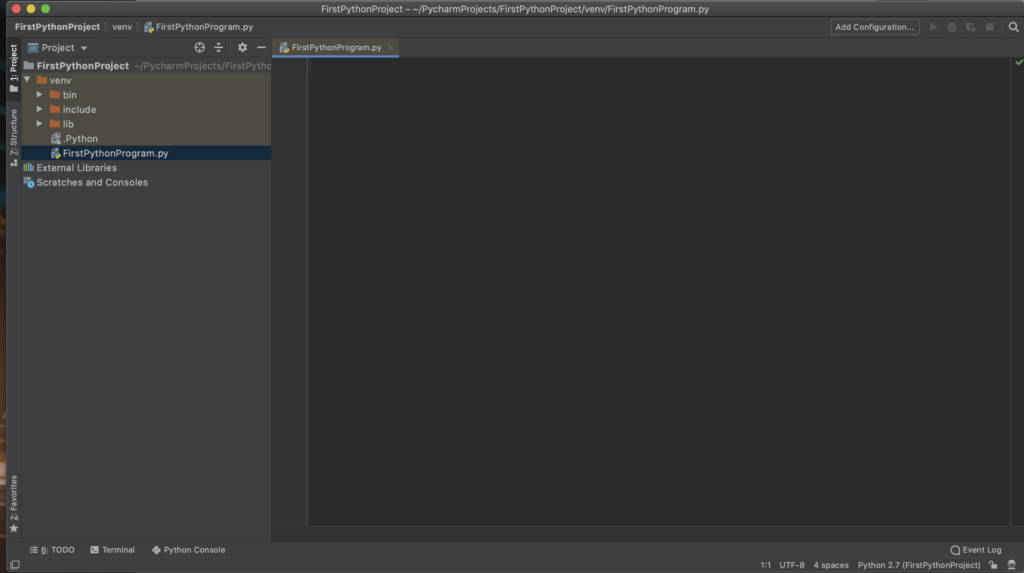
  1. Create a new python file(hello.py) on the workspace folder.  A new python file will be opened.
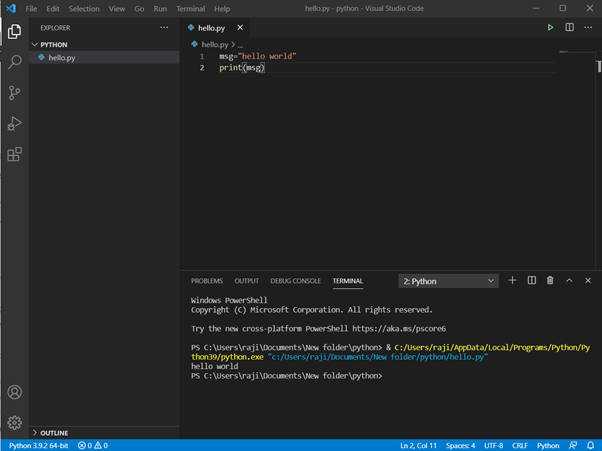
  2. After writing the code snipped select run option on the top right corner.

Configuration issues while building a Mobile Application using Kivy Framework

In this tutorial , we will see in detail about the common issues faced during the deployment of mobile applications using Kivy framework.Below are the pre requisites are required for running a mobile application.

Pre Requisties
1 – Python Intrepreter
2 – Kivy Framework
3 – Buildozer

1 – Python Interpreter

Python Interpreter helps to run the python programs.

1.1 Python version

To identify the version type python or python3 in the terminal window.  Here we have python 3.8 version installed in the system.

1.2 Python Interpreter path 

Below are the commands to be run on the terminal window to identify the directory path of python.exe

>>> import os

>>> import sys

>>> os.path.dirname(sys.executable)

1.3 Installing modules in Pycharm

Below are the steps to install module/package in pycharm.

   i) Go to Preferences and select “+” to install the package.

ii) Search the package/module to be installed and choose Install package option to complete installation.

1.4 Setting Python environment Variables

  Go to Control Panel -> System -> Advanced and select “System Variables”

  Select Environment Variables and find path and click on it

Click Edit and add the python.exe location path to set the python path.

This can also be done using SET PYTHONPATH=%PYTHONPATH%’path location of python.exe’

2 – Kivy Framework

     Kivy is an application framework to develop mobile applications using python.

This can be added as a module into Pycharm using install package option under Preferences.

2.1 Identify Kivy version installed to fix compatibility issues

3 – Buildozer :- Building Android mobile applications

After developing an application program using Kivy framework, to deploy the same into a mobile environment a build software is required. Buildozer helps in deploying the application program into .apk and run in Android OS.

3.1 Installing buildozer

Run the command pip install buildozer.

3.2 Creating Buildozer.spec file for building your application

Run the command buildozer init

3.3 Building application program to .apk file

Run the command buildozer -v android debug

Configuration Issues faced while building an application using BUILDOZER

Below are the issues faced in buildozer -v android debug

S.NoIssues Mitigation Steps
1Errors in accessing local SSL certificate1) Go to the python installed path and select Install Certificates.command file.

2) Double click and run the file.
2Android NDK installationVerify if the Android NDK successfully installed inside you buildozer path
3Android SDK InstallationVerify if the Android SDK successfully installed inside you buildozer path
4
Android SDK not installed

a) Follow below steps to install android SDK
cd ~/.buildozer/android/platform/android-sdk && \curl -L -O -C – https://dl.google.com/android/repository/sdk-tools-linux-4333796.zip
5Issues in identifying the path of Android SDKb) copy and paste pwd output to buildozer.spec line (no quotes needed):
android.sdk_path = PWD_OUTPUT
6If the build is not successful still due to compatibility issuesRe-install the buildozer 
pip install –user buildozer

# latest dev version
# if you use a virtual environment, don’t use the `–user` option
pip install –user https://github.com/kivy/buildozer/archive/master.zip

# git clone, for working on buildozer git clone https://github.com/kivy/buildozer
cd buildozer
python setup.py build
pip install -e.

Kivy Python Framework for Mobile application

                        In this tutorial, we will look into the installation of the Kivy Pathon Framework. Python does not have in-box features for mobile application development, but with additional extensible packages, python offers you the best mobile application development experience compared to its counterparts.

Kivy Framework – Definition:

           Kivy was first released in 2011. This cross-platform supports all operating systems like Windows, Linux , Mac etc.It supports all modes of input modes in GUI programming.

It supports the following features,

  1. multi-platform support
  2. Platform independent
  3. Shorter syntax and readable code
  4. Reusable approach
  5. Multi event acceptance
  6. Ease of creating widgets
  7. Rapid application development

INSTALLING KIVY:

        Kivy supports all versions of python till latest release of 3.8 for android apps. But for iOS python version of 2.7 is required.

Here we are going to see how to install Kivy framework in Pycharm IDE. It can be done in two ways.

  1. TERMINAL WINDOW: Run pip install Kivy

2) Go to Preferences->Python Interpreter

3) Select “+” install option to install the Kivy package

4) Enter “Kivy” in the search box and install the package.The Kivy package got installed.

Python program for CRUD operations from MYSQL Database

In this blog, we are going to see a sample program to handle CRUD operations on mysql DB from python interface. CRUD operation stands for CREATE, READ, UPDATE and DELETE. Here we are going to using Object oriented approach to better understand the functionality.

Pre – Requisite:

  1. Connection to MYSQL Database 
  2. Database Plugin 
  3. Mysql Python connector packages

We have already posted a blog on this prerequisite. Please feel free to have a look on the same.

Let’s understand the CRUD Functions

CREATE Function:

In this example we are going to create a table named Nutrients with 3 columns say ID, NAME and PERCENTAGE.

INSERT Function:

In the insert method we will get the user input values for the table and execute insert query into the Nutrients table.

READ Function (SELECT Statement):

In the read (select) python method, the values stored in the Nutrients table will be displayed.

UPDATE Function:

In the update python method , update statements on Nutrient table will be executed based on the Where clause conditions.

DELETE Function:

Delete method depicts how the records are deleted from the Nutrients table based on the conditions.

MAIN Program:

Main program file in python defines  a user defined class called “Crud” . 

It has two methods 1) InputChoices 2) crudfunctions.

InputChoices methods get’s user choice on which CRUD operation to be performed on the NUTRIENTS table

Crudfunctions method calls the corresponding python package and method for the user’s input choice.

C1 is the object instantiated for the Crud() class. 

Execution of Program

i)Enter the choice 1 to create the table NUTRIENTS.

ii) Enter the choice 2 to perform insert into NUTRIENTS Table and give the corresponding values to be inserted.

iii) Enter choice 3 to read the records from the table

iv) Enter choice 4 to update any of the values in the Table.

v) Enter choice 5 to delete records from the Table based on the conditions.

After deletion use the read function to check if delete has been performed. 

Hello World – ABAP REPORT

In every programming language, an explanation is given to the “Hello World” program. ABAP is no different. Here in this post, in addition to ‘Hello World’ program explanation, we will see where the ‘Hello World’ program is stored and executed.

Which development object is used to create the ‘Hello World’ Report

Program development object is available in the Repository Browser. The Repository Browser section is reached through the SE80 transaction. Fig1 explains the navigation in SE80 transaction.

Figure 1 Program Development Object

The program can be saved either locally or can be assigned to a existing package.

The package assignment will always be asked if a development object is created.

Note: Program name must always start with “Z” if it is saved locally.

In the ABAP report, the first line by default is ‘REPORT program_name’. The ‘Hello World’ string is pointed out with the write command.

How to convert image to text using Python in Object oriented programming

Pre-Requisties:

  1. pytesseract package needed to installed

Installing Pytesseract

Installation can be done in two ways in PyCharm IDE,

  1. Run the below command in the terminal window,

                         pip install pytesseract 

ii)Otherwise, Go to File->New Project Settings->Preferences.In the project Interpreter select the Add(+) symbol and choose the pytesseract package from the list and select Install package. 

Once we complete install of pytesseract we are good to start program for image conversion.

LETS GET STARTED

In this example we are going to have four .py files to process the image to text .

  1. InputFile -> to get the image file path
  2. Image Conversion-> to process the image to text
  3. OutputFile -> To display the text
  4. Main Program -> To process the all the files.

The RequestInput file gets the user input image if not process the default image stored. 

The imgtotext file does the image conversion to text using image_to_string method 

The PrintOutputString file prints the output text. 

The MainProgram file defines a user defined class “MainClass” and declares a default file path. If user input file path is not received default file path will be processed.This also imports other three files.

LETS GEAR UP TO RUN THE PROGRAM

The MainProgram is the executable file. Select Run -> Run the MainProgram.py

Give the full file path for the image. 

If the user input is not given default stored image is converted to text.

Thus we have achieved image to text conversion using object oriented way.

POINTS TO BE NOTED:

  1. The image can be stored either in the local path or within the Python Project.   The full file path should be given in both the ways.

2)   The package pytesseract should be properly installed for successful execution of the code.

Introduction to Python

Python is a general purpose , interpreted , interactive and object oriented programming language.

It supports both functional and structured approach as well as object oriented programming.

It is easy to learn, use and understand.

IDE available: IDLE,PYCHARM,SPYDER,PYDEV etc

LETS START LEARNING PYTHON

Steps for Installing an Python IDE

Select any python IDE of your choice and install the same.

Here we will see about installing PyCharm

  1. Download the PyCharm package from https://www.jetbrains.com/pycharm/

2)   Run the downloaded package and open the application as below 

3)  Choose the Create New Project and give a suitable name for the project of your choice.

4)  Choose Base Interpreter as Python3.8 (preferable version greater than 3) 

5)  In the left pane , you will be able to view the created project

6)  Let’s start with a basic program to better understand the python structure.

7) Go to File -> New and create a python file and give a suitable name.

8)  Python file will be created in .py format and will be placed under the project created.

9)  Lets write a simple code in python to do addition of two numbers based on users input.

10) To run the program , Go to Run -> Run the .py file 

Let’s understand the program :

In this program we are defining a Class called Sample which has two methods __getinput() and sPrint() methods

__getinput() is a private method and it is accessible only within the class.Private methods are declared by double underscore before the name __

sPrint() is a public method and can be accessed in all the classes of the package.

s1 is the object created for the class Sample

s1.sPrint() statement calls the methodPrint() 

sPrint() method in turn calls the private method __getinput()  to get the inputs from the user.

__getinput() returns the user inputs and sPrint() performs the addition of two numbers and prints the result.

Declaration, Assignment and Printing Data

For any new programmer, who is keen to learn coding, the initial step would be to strengthen the thinking process. Logical thinking is a key to be a successful programmer. Syntax will only change in programming. So all programming languages will have if else, for loop, while loop, switch case, classes, objects, references, constructor etc. It is the person’s logical think tank which plays a crucial role in writing an efficient program.

Rule1: Never think about writing an efficient fast effective code.

Rule2: Have confidence on what you write. It can go wrong. But make sure that you take the lesson learned from writing that wrong code.

Rule3: Always hold the Rule 2 in mind.

Rule4: Say you have written some ten lines of code. First step would be to write a program without syntax error

Rule5: Strengthen your thinking with those 10 lines of code. Ask yourself  ‘what I wrote’ ‘How I started’ ‘How I ended’. Repeat this Rule 5 till you are  +∞ percentage sure about the logic. This is actually an exercise. This should stimulate your brain to think, provided you have the necessary interest. Now let’s strengthen the thinking with “Declaration, Assignment and Printing Data” using ABAP program.

Be it any field, Physics, Chemistry, Maths input should come out as output in the respective form. Look at the below figure.,

Learn ABAP programming with these below steps.

  1. First have sample data written in a rough sheet. Define those data with data types. For example ‘New Born’ is a name of string type. Similarly, figure out the data type of each data.
  2. Declare meaningful variable names for the data with the data type in ABA editor.
  3. Input the data which is assigning the data to the variables defined.
  4. Process the data. For example, if age<40, then the generation type is young
  5. Print out the data processed.

Below figure shows the direct way of doing it in ABAP

The same can be achieved through structures and internal table. Declaration, Assignment and printing out data is similar through structures and internal table. But the data variables are declared inside the structure. Data is assigned through structures. Each line of record through structures is stored in internal table. Then it is printed out by looping through the internal table. Below figures explains about structure and Internal table.

Example:

Variable declaration

TYPES: BEGIN OF st_corona,

Person_id TYPE int4,

Age TYPE int4,

Gender TYPE char01,

First_name TYPE string,

Last_name TYPE string,

Address TYPE string,

Postalcode TYPE c length 10,

Infection_rate_city TYPE decfloat34,

END OF st_corona.

DATA lt_corona_table TYPE TABLE OF st_corona.

DATA ls_corona_struct TYPE st_corona.

DATA:  r_desc TYPE REF TO cl_abap_structdescr,

Wa_comp TYPE abap_compdescr.

DATA l_string TYPE string.

DATA stru_string TYPE string.

FIELD-SYMBOLS <fs_field> TYPE any.

Data Assignment

Ls_corona_struct-person_id = ‚1000‘.

Ls_corona-_struct-age = 31.

Ls_corona_struct-gender = ‚M‘.

Ls_corona_struct-first_name = ‚New‘.

Ls_corona_struct-last_name = ‚Born‘.

Ls_corona_struct-address = ‚new no.12 streetnew 2nd street‘.

Ls_corona_struct-postalcode = ‚600021‘.

Ls_corona_struct-infection_rate_city = ‚0.8‘.

APPEND ls_corona_struct TO lt_corona_table.

Printing Data

R_descr ?= cl_abap_typedescr=>describe_by_data( ls_corona_struct ).

WRITE: / ‚Corona details‘.

LOOP AT lt_corona_table INTO ls_corona_struct.

        LOOP AT r_descr->components INTO wa_comp.

                 WRITE: / wa_comp-name.

            ASSIGN COMPONENT wa_comp-name OF STRUCTURE  ls_corona_struct TO <fs_field>.

                  l_string = <fs_field>.

            CONDENSE l_string.

            WRITE l_string.

       ENDLOOP.

ENDLOOP.

WRITE: / ‚End of corona details‘.