How to rename columns in SAP ALV DISPLAY of type CL_SALV_COLUMNS_TABLE.

The columns can be renamed with the object of the class cl_salv_column_table. There are four methods available such as SET_SHORT_TEXT (), SET_MEDIUM_TEXT(), SET_LONG_TEXT and SET_TOOLTIP(). The method can be chosen based on our requirement of text length.

DATA lr_salv_columns_table TYPE REF TO cl_salv_columns_table.

DATA lr_salv_column_table TYPE REF TO cl_salv_column_table.

DATA lv_short_text TYPE scrtext_s.

DATA lv_medium_text TYPE scrtext_m.

DATA lv_long_text TYPE scrtext_l.

DATA lv_tip_text TYPE lvc_tip.

lr_salv_columns_table = lr_alv_grid -> get_columns ().

lr_salv_column_table ?= lr_salv_columns_table -> get_column(‘CONTACT_NAME’).

lv_short_text = ‘short_contact_name’.

lr_salv_column_table -> set_short_text (lv_short_text).

lv_medium_text = ‘medium_contact_name’.

lr_salv_column_table -> set_medium_text (lv_medium_text).

lv_long_text = ‘long_contact_name’.

lr_salv_column_table -> set_long_text (lv_long_text).

lv_tip_text = ‘tip_contact_name’.

lr_salv_column_table -> set_tooltip(lv_tip_text).

If you wish to force the ABAP execution to use the short text instead of other texts, then there is an easy way to achieve this. Just ignore assigning the medium and long text, then it automatically considers the short text. The other two text formats are ignored by default.
How to insert and delete column in SAP ALV Display of type CL_SALV_TABLE.

The column is inserted through the field catalog of the ALV Table. It is set during the method call FACTORY ().

Step1: Extend the structure either locally or globally through the Transaction SE11 with the additional field.

TYPES: BEGIN OF ty_contact.

                            INCLUDE STRUCTURE ztt_db_table2.

                            TYPES: contact_age TYPE ZDE_contact_age.

              END OF ty_contact.

DATA lt_contact TYPE STANDARD TABLE OF ty_contact.

              It is always recommended to use an unique Data element for the fields of the structure, so that the column heading text can be easily maintained.

Step2: Call the Factory() Method of class CL_SALV_TABLE

CALL METHOD cl_salv_table => factory

              IMPORTING

                            r_salv_table = lr_alv_object

              CHANGING

                            t_table = lt_contact.

Through the field catalog of the ALV Table, a new column can be inserted or deleted.

There is a method REMOVE_COLUMN() for the column class ‘CL_SALV_COLUMN_TABLE’. But it is protected. Therefore the inheritance is needed to remove the column.

How to hide the column in new SAP ALV Display of type CL_SALV_COLUMNS_TABLE

The column can be edited using the column object. The Column object can be retrieved from the get_columns( ) method of the ALV object.

Step1: Get the columns object from the ALV object.

DATA lr_columns TYPE REF TO cl_salv_columns_table.

Lr_columns = lr_alv_object->get_columns( ).

Step2: From the columns object, get the particular specific column object ‘CONTACT_ID’. The name mentioned in the structure must be used. Even if the displayed name in ALV output is different, please always use the name in the structure.

DATA lr_specific column TYPE REF TO cl_salv_column_table.

Lr_specific_column = lr_columns->get_column( ‘CONTACT_ID’ ).

Step3: Call the set_visible method of the column object to hide the column in ALV Display. Please set the abap_false value to the importing parameter.

Lr_specific_column->set_visible( abap_false ).

How to use events of class CL_SALV_EVENTS_TABLE in SAP ABAP ALV Display

The new ALV Display provides different events based on the class CL_SALV_EVENTS_TABLE. It is much lesser compared to the old ALV Display. The Events can be found in the ‘Events’ tab of the class.

Let us discuss about the following important Events of the class CL_SALV_EVENTS_TABLE.

EventsDescription
DOUBLE_CLICKThis event will be triggered, when the user double clicks.
LINK_CLICKThis event will be triggered, when the user clicks on Hotspot or Button. Parameters are Row and Column
ADDED_FUNCTIONThe defined function will be triggered. The parameter is E_SALV_FUNCTION.

The following steps are needed to facilitate an Event action.

  1. Define the Event handler
  2. Register the Event handler
  • Definition of Event Handler

CLASS zcl_handler DEFINITION.

    PUBLIC SECTION.

         CLASS-METHODS:  on_link_click FOR EVENT link_click OF cl_salv_events_table

              IMPORTING row column.

ENDCLASS.

CLASS zcl_handler IMPLEMENTATION.

    METHOD on_link_click.

          FIELD-SYMBOLS <ls_contact>  TYPE  ztt_db_table2.

          READ TABLE lt_contact INDEX row  ASSIGNING <ls_contact>.

          IF  sy-subrc  = 0   AND column = ‘CONTACT_ID’.

              “” DETAILS OF THE CONTACT PERSON IS DISPLAYED.

         ENDIF.

    ENDMETHOD.

ENDCLASS.

  • Register the Event Handler

START-OF-SELECTION.

DATA lr_salv_events_table TYPE REF TO cl_salv_events_table.

Lr_salv_events_table = lr_alv_grid->get_event( ).

SET HANDLER zcl_handler=>link_click  FOR  lr_salv_events_table.

How to insert functions to the Functions toolbar of new SAP ALV Display CL_SALV_TABLE

The new ALV Display based on the class CL_SALV_TABLE offers you the possibility to add a new function. It is completely based on the Display mode. In the container mode, the function is added through the functions object. In the complete mode, it is added through the GUI status for the Dynpro.

Adding functions in Container mode:

The Add_function( ) method of the functions object is used to insert functions to the functions toolbar.

DATA lr_functions_list TYPE REF TO cl_salv_functions_list.

lr_functions_list = lr_alv_object->get_functions( ).

lr_functions_list->set_all( ).

lr_functions_list->add_function( name = ‘SUM’  text = ‘SUM’  tooltip = ‘SUM’

position = if_salv_c_function_position=>right_of_salv_function ).

Adding functions in complete mode:

In order to insert a new function in complete mode, copy the GUI status SALV_TABLE_STANDARD in your report.

  1. Open the function group SALV_METADATA_STATUS through the transaction SE80. Right click on the GUI status SALV_TABLE_STANDARD.
  2. Select the copy from the options in order to copy the GUI status.
  3. Give the program name and a name for the copied GUI status in the popup window and finally confirm the entries.
  4. The ALV object must be able to recognize the newly added GUI-status. It is recognized through the set_screen_status method of the ALV object.

Lr_alv_object->set_screen_status( report = ‘ZALV_NEW_FUNCTION’ pfstatus = ‘SALV_TABLE_STANDARD’ set_functions = lr_alv_object->c_functions_all ).

The GUI status can be further adjusted to insert the new function code.

How to activate the functions Toolbar of new ALV Display CL_SALV_TABLE

By default, the function toolbar is not displayed in the new ALV Display. It must be activated. The functions object is retrieved from the ALV Object. In order to activate the complete function toolbar, the set_all( ) method of the function object must be called.

DATA lr_functions_list TYPE REF TO cl_salv_functions_list.

lr_functions_list = lr_alv_object->get_functions( ).

lr_functions->set_all( ).

How to create a SAP ALV Display using the class CL_SALV_TABLE

The new ALV Display model based on the class CL_SALV_TABLE provides various functionalities similar to the old ALV Display. But the data fields of the ALV Table are not directly editable.

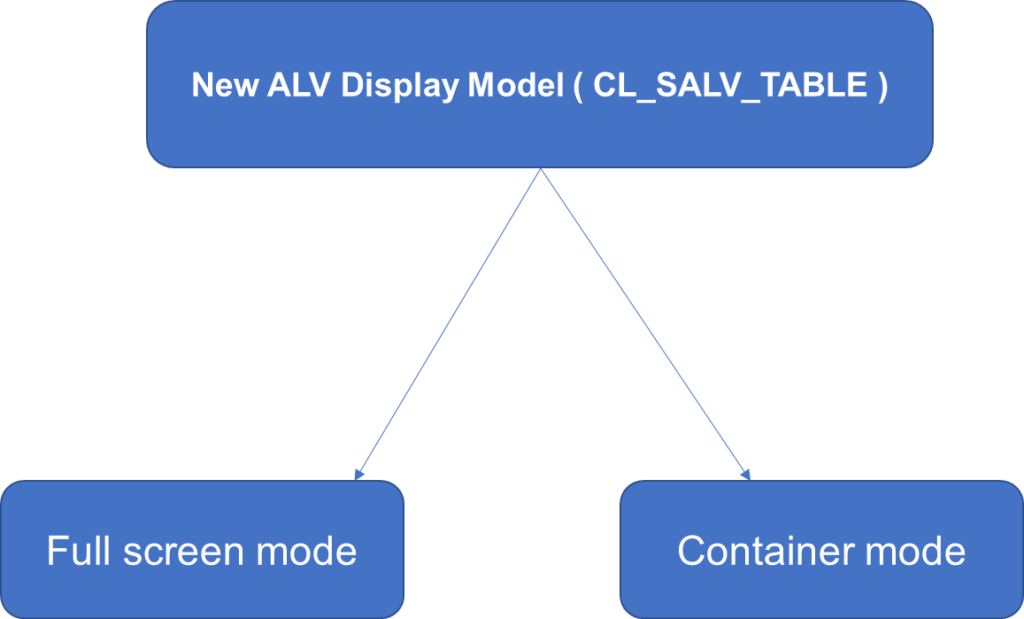
There are two Display modes for the new SAP ALV Display based on class CL_SALV_TABLE.

Full Screen mode: There is no need of container and Dynpro.

Container mode: It is created through the Dynpro and container.

Full Screen mode: The following steps are necessary to construct an SAP ALV Display based on the class CL_SALV_TABLE.

  1. Fill an Internal table with the Details.
  2. Create an object of class CL_SALV_Table through FACTORY( ) method.
  3. Display ALV.
  • Loading Internal Table

DATA lt_contact TYPE TABLE OF ztt_db_table2.

SELECT * FROM ztt_db_table2 INTO TABLE lt_contact.

  • Creation of object of type CL_SALV_TABLE

The static method ‘FACTORY’ of the class CL_SALV_TABLE returns the object of class CL_SALV_TABLE as an exporting parameter. This is the instance of the ALV object.

DATA lr_salv_table TYPE REF TO cl_salv_table.

CALL METHOD cl_salv_table => factory

              IMPORTING

                            r_salv_table = lr_salv_table

              CHANGING

                            t_table = lt_contact.

  • ALV Display

Finally the ALV List is displayed by calling the Display method of the ALV object.

lr_salv_table -> Display ().

Container mode :

              In order to display the ALV list in container mode, you need a Dynpro with a container.

The following steps are written to Display the ALV.

  1. Creation of container object.

DATA lr_container TYPE REF TO cl_gui_custom_container.

CREATE OBJECT lr_container

              EXPORTING

                            Container_name = ‘SALV_CONTAINER’.

  • Creation of ALV object.

In this mode as well, the static method ‘FACTORY’ of the class cl_salv_table is used to create the ALV object. The container object is given as an exporting parameter in the method call. The Internal table with the ALV contents is specified in the changing parameter.

              DATA lr_salv_table TYPE REF TO cl_salv_table.

              CALL METHOD cl_salv_table => factory

                            EXPORTING

                                          r_container = lr_container

                            IMPORTING

                                          r_salv_table = lr_salv_table

                            CHANGING

                                          t_table = lt_contact.

  • Display the ALV List.

lr_salv_table -> display ().

CALL SCREEN 1000.

How to write a Cover Letter in Germany for Job application

  • It should not be more than one page.
  • The content should occupy only 75% of the page.
  • It can be divided in to 3 or 4 paragraphs.
  • If you know the contact person in HR Department for the corresponding position, in which you are applying, then address it directly with Sehr geehrter Herr. or Sehr geehrte Frau. If you don’t know the corresponding person, then address it with Sehr geehrte Damen und Herren.
  • Include the Job Location and Date at the beginning and also your full name with address and contact details.
  • Mention the Job Title as the subject title of the Cover Letter.
  • The first two lines of the Cover Letter is very critical to get your Job application noticed. So make sure you highlight your experience or your skills which fits for the Job. It is very important that those two lines should ensure that your Job application must stand out from others. It must refer to the required skills sets of the Job.
  • Please follow a chronological order in your Cover Letter. For example, mention your current working experience or your current studies.
  • The first paragraph must convey to the employer that you are very much interested in the Job. It must be justified with the reason.
  • You should never mention that the organisation is the reason to apply for the Job. Instead it should be the Job position and its requirements.
  • The points mentioned in the Cover Letter must not be repeated in the Curriculum vitae or Resume.
  • Please don’t forget to conclude that you are looking forward for a personal interview.
  • Please sign your cover letter and mention your full name below the signature. Include also the Date and Place.
  • The skills, experience, Qualification must match atleast 50% to the Job requirements.

How to save Layout in ALV List.

The user can be able to change the layout such as hiding columns, sorting specific columns or adding a filter in ALV Table List. The user can also be able to save the layouts of ALV Report in the toolbar. In order to enable this feature, the user must activate this option programmatically.

              There are two key steps to activate the save layout option in ALV table list.

  1. Assign the fields report, username of the structure disvariant.
  2. Set the exporting parameters is_variant, i_save during the method call SET_TABLE_FOR_FIRST_DISPLAY of ALV object.
  • Assign fields of structure DISVARIANT

It contains the details of the report and username to which the layout can be saved.

              DATA ls_variant TYPE disvariant.

              ls_variant-report = sy-repid.

              ls_variant-username = sy-uname.

  • Setting the exporting parameters is_variant, i_save.

There are different saving options such as ‘U’, ‘X’, ‘A’ for the exporting parameter i_save.

              U: User defined layout can be saved in this option. The layout cannot be seen by other users.

X: It is the Global layout. Other users can also see this layout.

              A: The user can save both user defined layout and Global layout.

              Let us look at the following SET_TABLE_FOR_FIRST_DISPLAY Method.

              CALL METHOD lr_gui_alv_grid -> set_table_for_first_display

                            EXPORTING

                                          is_variant = ls_variant.

                                          is_save = ‘U’.

              If you are having more than one ALV in the same program, then each ALV must be uniquely differentiated through the field HANDLE. The field HANDLE hold a ID with four characters which is unique. Each ALV variant is differentiated through this unique ID.

How to design ALV List with total and subtotals.

The columns of the ALV list can be aggregated using the fields subtot of internal table lvc_t_sort.

There are mainly two changes needed to achieve this Aggregation.

  1. The Internal table lvc_t_sort with the field subtot must be set to ‘X’.
  2. The field ‘do_sum’ of field catalog must be set to ‘X’ to the column which needs to be aggregated.

Let us look at the following code example.

DATA lt_sort TYPE lvc_t_sort.

DATA ls_sort TYPE lvc_s_sort.

ls_sort-fieldname = ‘CONTACT_ID’.

ls_sort-subtot = ‘X’.

APPEND ls_sort TO lt_sort.

LOOP AT lt_field_cat ASSIGNING <ls_field_cat> WHERE fieldname = ‘PURCHASE_COST’.

<ls_field_cat>-do_sum = ‘X’.

ENDLOOP.